Meetings menu bar | More options menu bar | How to create a Teams meeting
How to join a meeting from the Teams calendar | How to download an attendance report | How to record a meeting
How to create a transcript of a meeting | How to change meeting permissions | How to copy join links | How to invite a channel
The meetings menu bar in Teams gives you lots of features to help make your meeting better.
 |
The time shown is the elapsed time of the meeting so far. If the meeting is being recorded, a symbol to let you know will also be shown here. |
 |
This option will allow you to turn your camera on and off as you choose. If the camera icon has a slash through it, it means your camera is switched off. |
 |
This option will allow you to turn your microphone on and off as you choose. If the microphone icon has a slash through it, it means your microphone is switched off. |
 |
This option will allow you to share you screen - you can choose which screen you would like to share. All users within the meeting will see what is being shared. For more information on screen sharing, click here. |
 |
This option will open up another menu, for more meeting options. More information about this menu can be found here. |
 |
You can virtually raise your hand in meetings using this option - this allows you to show you'd like to make a comment or ask a question without disrupting the meeting. |
 |
This option will open a window on the right hand side of your screen which allows meeting attendees to write messages in the meeting chat conversation. |
 |
The Show Participants option opens a window on the right hand side of your screen and details the attendees of the meeting. From here, you can also invite more users to the meeting. |
 |
This option allows you to leave the meeting - it won't end the call for everyone. |
The 'More Options' menu in meetings
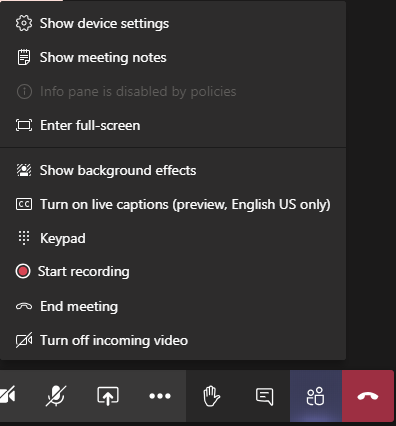
- Show device settings - view your current device settings. Useful to check if you are having any issues with your sound or video to make sure everything is selected correctly
- Show meeting notes - this will open a notepad where you can take meeting notes
- Enter full screen - use this option to maximise the view of the meeting you are currently in
- Show background effect - background effects can be used when you're in a meeting to, for example, blur your background or add a new background image. More information about background effects can be found here.
- Turn on live captions - live captions can be used in all meetings, and will track everyone's voice to create live captions throughout the meeting. Individual users must turn this on if they want to use them
- Keypad - this option will open up a phone keypad for dialling numbers. Please note that your University Teams account is unable to make calls to telephone numbers.
- Start recording - you can record the meeting, and the video will uplaod to Stream where you can then share with other users
- End meeting - selecting this option will end the meeting for all attendees, rather than just leaving the meeting yourself
- Turn off incoming video - this will turn off all incoming video, so you will be unable to see any other attendees' videos
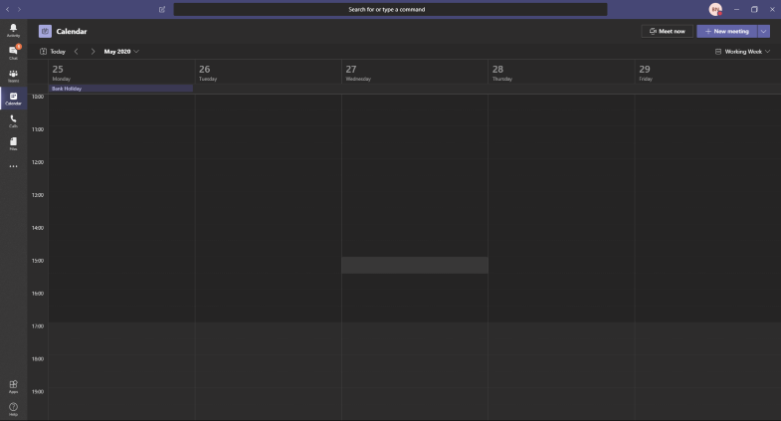
First, you'll need to open the Calendar tab, which you can find on the left hand menu bar of Teams.
From here, select the 'New meeting' option shown on the top right hand side of the window.
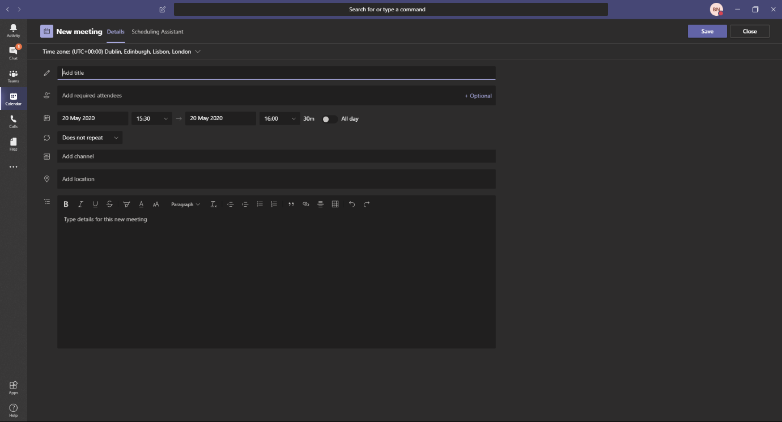
You can now set up the meeting by choosing the date and time as well as inviting all of the users that need to attend. Once you have filled in all of the required boxes select save in the top right corner.
How to download the attendance report
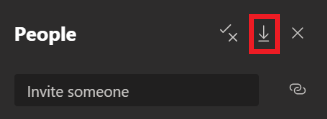
You can download the attendance report of any meeting, which will outline who attended the meeting. Do this by selecting the Show Participants option in the menu bar and then clicking the Download attendance list option.
Once you have joined the meeting select the more actions option in the menu bar.
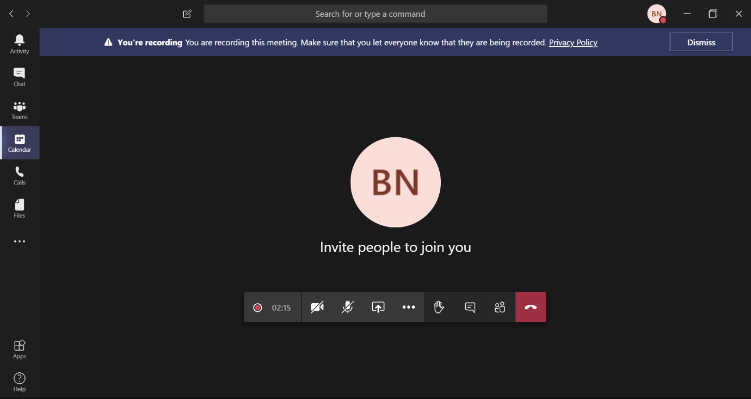
Select Start recording. Everyone in the session will be notified that a recording is taking place. The symbol next to the total elapsed time will also indicate that a recording is taking place.
How to get transcripts for meetings
- Load up Microsoft Stream (available here) and log in using your University credentials
- Locate the video you would like the transcript for and open it. This will take you to a new window
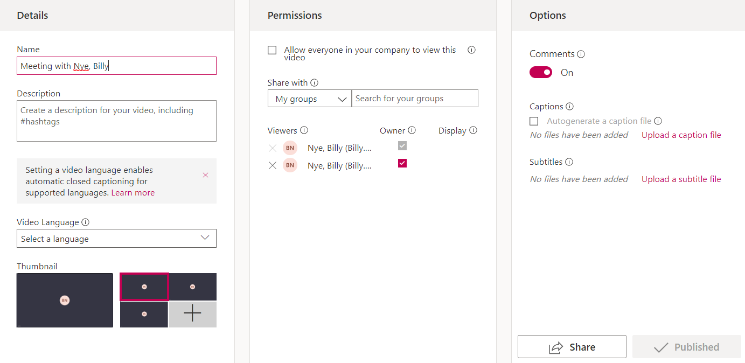
- Click the 3 dots in the menu bar beneath the video and select Update video details
- In the new window, you will need to select the language you would like to use for the transcript in the Video Language drop down (usually, this will be English). Make sure that the tick box for Captions is checked, and then select Apply at the top of the page.
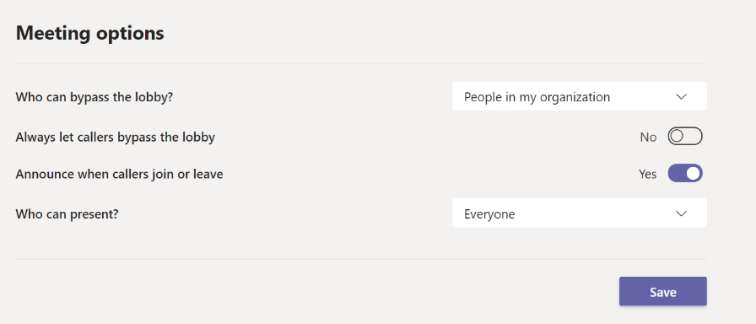
Meeting permissions can be set up after you have scheduled a meeting.
- Locate the meeting that you have set up in the calendar in Teams (on the left hand menu bar)
- Select meeting options - this will open a new window

- You can now use this page to edit your meeting settings
- To find out more about each of these options, click here
How to copy a join meeting link
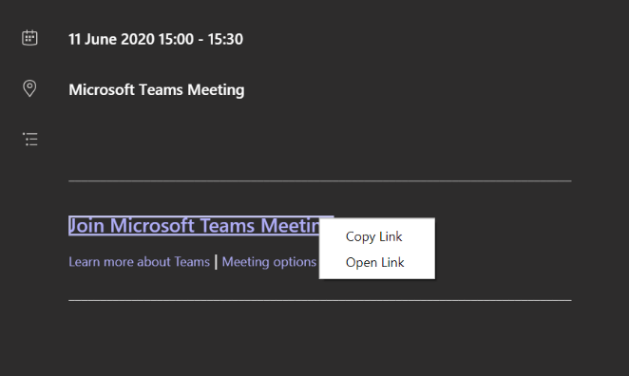
A join meeting link can be useful when you have to invite a large group of people to a meeting. Once you have set your meeting up, open it in your calendar in Teams (available in the left hand menu bar). There will be a link at the bottom of the page - right click this and select Copy link. You can then use this link anywhere you need to.
You can quickly invite all members of a channel to a meeting, instead of having to invite them all individually. To do this, when you are setting your meeting, select Add channel, and then select the channel you want to add from the drop down list of all Teams and channels.
Please note that private channels cannot be added to meetings this way.


/prod01/wlvacuk/media/departments/digital-content-and-communications/images-18-19/iStock-163641275.jpg)
/prod01/wlvacuk/media/departments/digital-content-and-communications/images-2024/250630-SciFest-1-group-photo-resized-800x450.png)
/prod01/wlvacuk/media/departments/digital-content-and-communications/images-18-19/210818-Iza-and-Mattia-Resized.jpg)
/prod01/wlvacuk/media/departments/digital-content-and-communications/images/Maria-Serria-(teaser-image).jpg)
/prod01/wlvacuk/media/departments/digital-content-and-communications/images-2024/241014-Cyber4ME-Project-Resized.jpg)
/prod01/wlvacuk/media/departments/digital-content-and-communications/images-18-19/210705-bric_LAND_ATTIC_v2_resized.jpg)

